So, you have decided to implement an ASO strategy for your mobile app or game and you are looking around for ASO tools that you can use to optimize your strategy and to achieve maximum visibility in app stores. In this post we’re going to learn how to use TheTool to start working on your ASO strategy.
Table of Contents
What is ASO?
You probably already know that ASO stands for App Store Optimization, which is a set of processes related to the optimization of your app store listing in order to achieve maximum visibility in search results, top charts rankings and featured, improve conversion rate to install and, as an end goal, to achieve more organic installs.
Finally, you came across TheTool and decided to give it a try and see how it can help you with your app business. And now you are looking for a simple and complete guide to your App Store Optimization at one glance. Look no further 🙂
Step 0: Sign up for TheTool (it’s FREE!)
Choose your plan (or go to step 1 if you have already signed up). We recommend GROWTH – this plan has the most complete list of features to start from.
We are now offering a free trial for any of our paid plans, which will be available for a very limited time, so take your chance and sign up now to enjoy the whole month of TheTool for FREE!
Submit your details (we will not charge you anything until your Trial expires) and confirm by clicking a link that we have sent to your email (check your spam folder if you haven’t received an email yet). Easy!
Make sure you have entered the right email address, because without email verification you can’t get started!
Step 1: Add your mobile apps / games
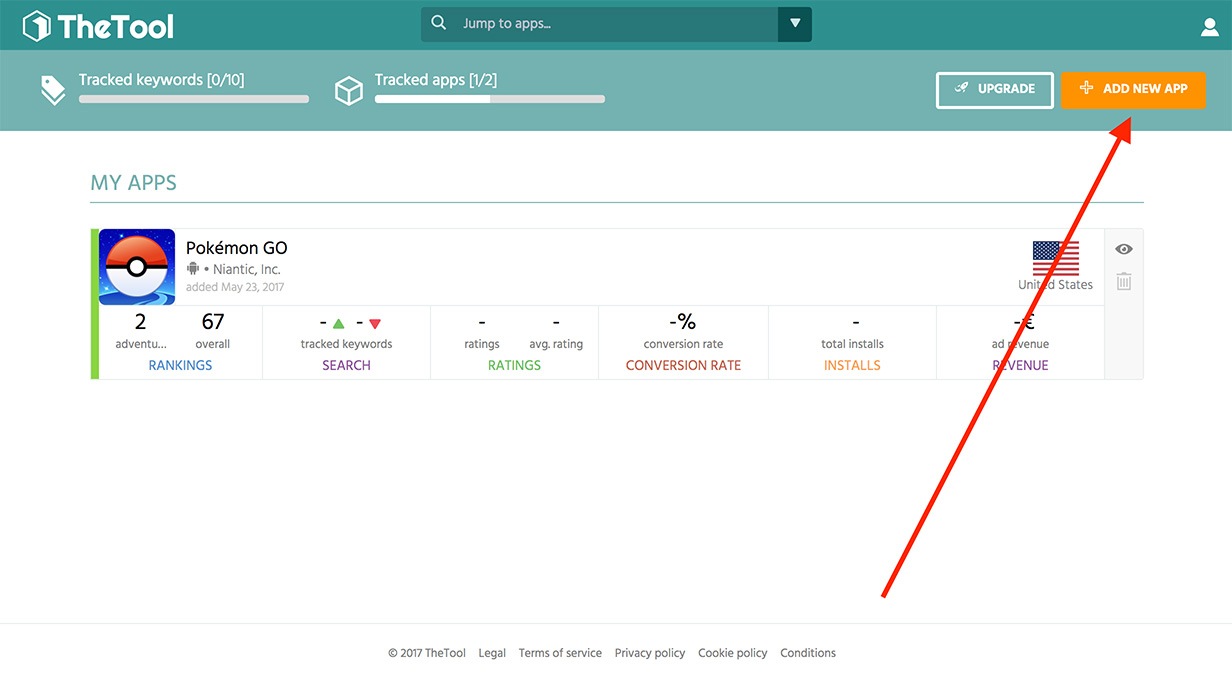
The first time you login into TheTool dashboard, you will receive a popup message asking you to add your first app. Anyway, you can always add more by clicking on the “Add new app” orange button in the top right corner of the page:
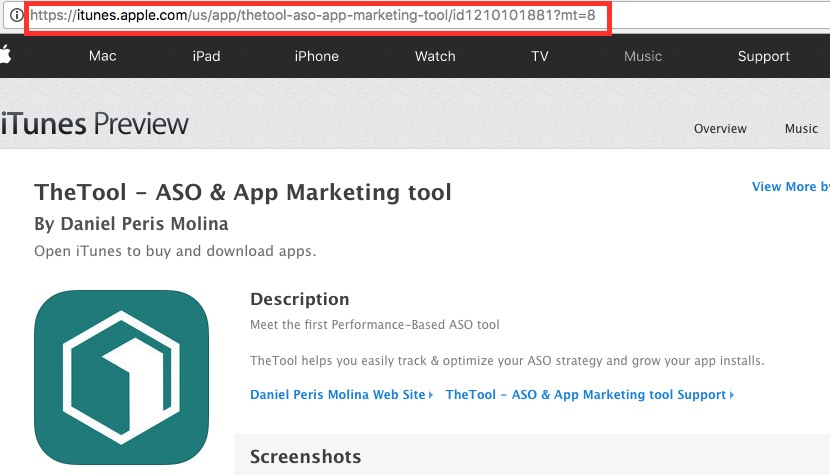
Follow 3 simple steps to add your app: choose operating system, “home” country of your app (the main market for which you have developed it), and add the app URL / ID from the app store:

iOS:
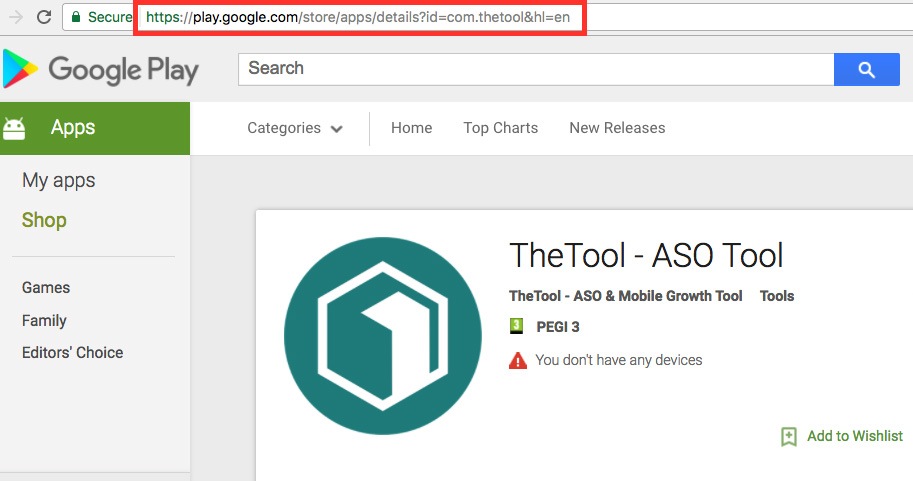
Google Play:
When your app appears in this window, select it and click “Next”.
Well done! Your app is successfully added!
Step 2: Add your competitors
When you have added your app, it is time to select some competitors to monitor! All our paid plans include Competitor Analysis:
- Startup plan: 1 competitor per app
- Growth plan: 3 competitors per app
- Ninja plan: 5 competitors per app
Select your competitors from a few suggestions, or add them manually by typing in their app URL or ID / package:
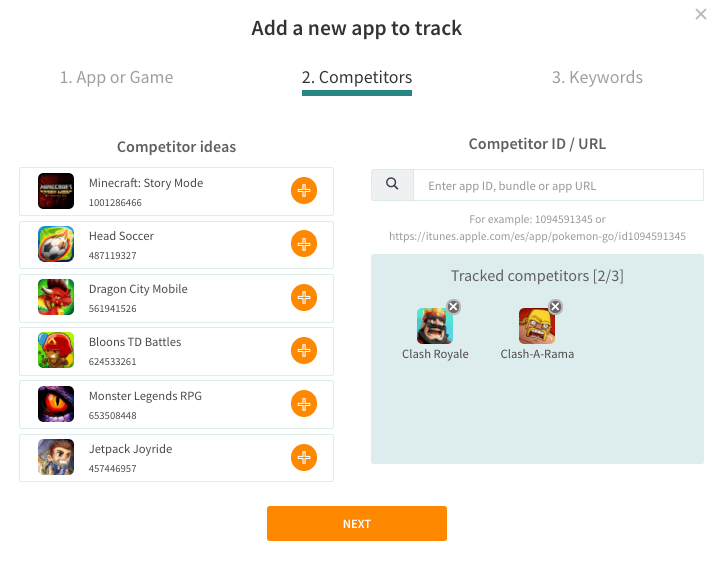
When you are ready with selecting competitors, press “Next” and move on to the next step!
Step 3: Add keywords
Once you have added an app, and chosen your competitors, you will get a list of keyword suggestions for your app. You can also type your own keywords, or get more keyword suggestions later on.
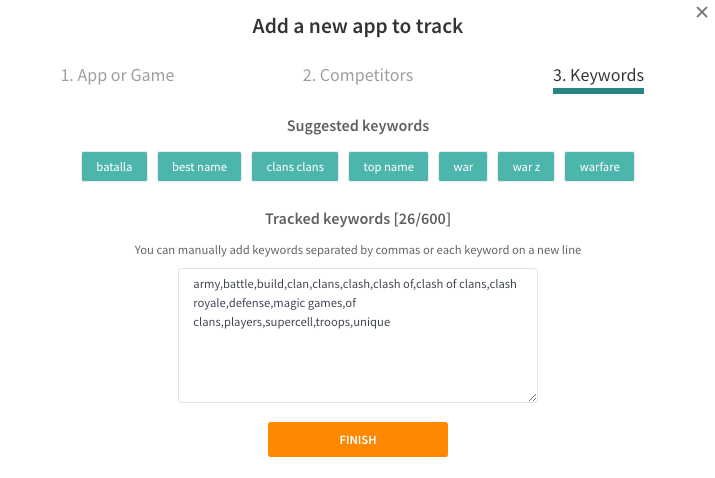
On the App Metrics page the first thing you see is an overview about your ASO strategy. Scroll down to keywords, or click on the magnifying lens icon on the left side menu, and press “Add Keywords” to upload some:
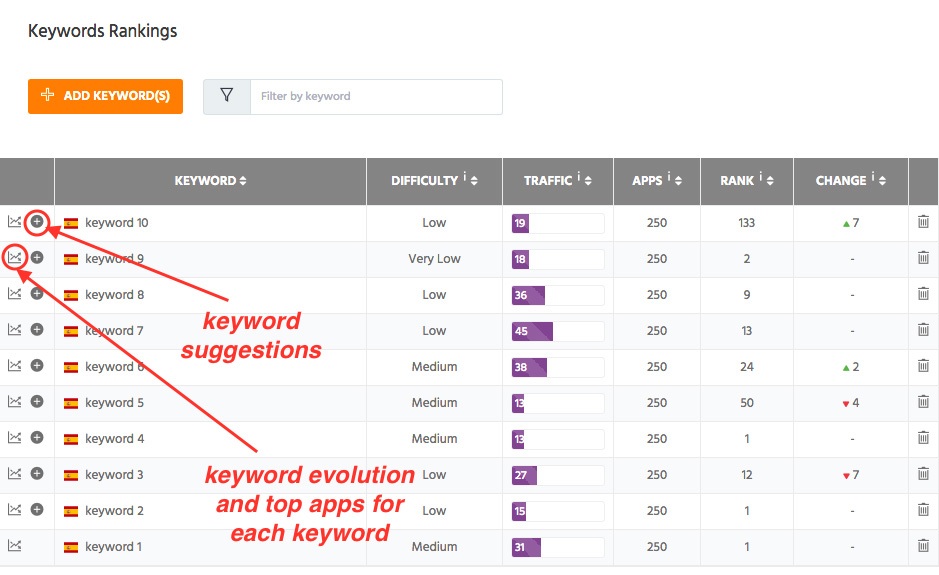
Tip: Carefully select, monitor and regularly revamp your keywords – this is the base of any ASO strategy!
Read these ASO tips on how to make most out of your app keywords optimization:
In TheTool:
- Go for long-tail keywords and keyword combinations (try suggested keywords)
- Pick the keywords with low or medium difficulty and most traffic estimation
- Monitor your keywords constantly and eliminate those which are not performing for your app
- Make sure your app ranks the highest for its own brand name!
In the app stores:
- Include 2-3 of your most powerful keywords into your App Name / Title (if possible), after your brand name
- Google Play Store: Include the most important keywords in your short description and the first lines + last lines of full description
- Apple App Store: include your keywords into the special keywords field. Maximum is 100 characters, so don’t use spaces, separate every word with comma (so you can also rank for the combination of the keywords you introduced) and don’t spell out numbers (instead, write it in digits)
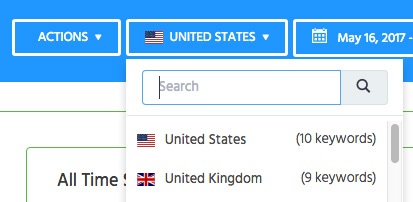
Step 4: Localize your app store listing
Select a country in the top right corner and change it (we track 91 countries and soon we will add more). You will automatically receive a message to add new keywords. You can import already existent keywords by clicking on “Import Keywords” button, or enter new ones by clicking “Add keywords” button:
Tips:
- By localizing your app, you can increase the conversion rate of your app and get installs from the countries that you have never expected
- Try to localize your app listing before localizing the whole app
- When you understand which country has the greatest potential for your app, you can consider translating the app in full
- Even english-speaking markets have differences between each other!
Step 5: Integrate your developer console
After completing previous steps, follow the message asking you to integrate iTunes Connect or Google Play Console. Also, you can go to “Integrations” menu and add integrations from there.
Integrating a developer console is extremely useful in order to collect installs and conversion rate data and view how App Store Optimization impacts installs and vice versa.
To start, click on the button “Add integration” on the main page with your app overview.
iTunes Connect integration
Integrating iTunes Connect in TheTool is easy!
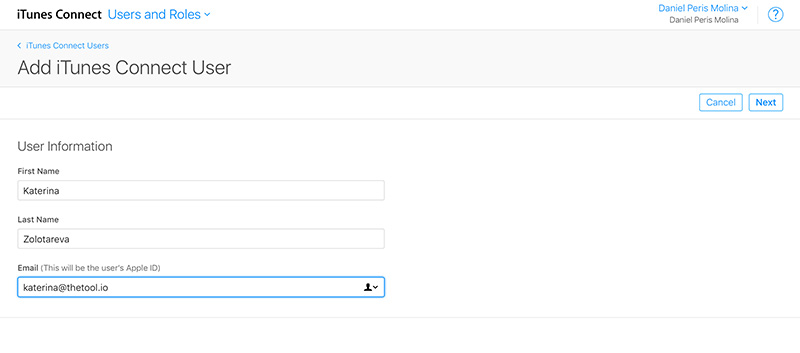
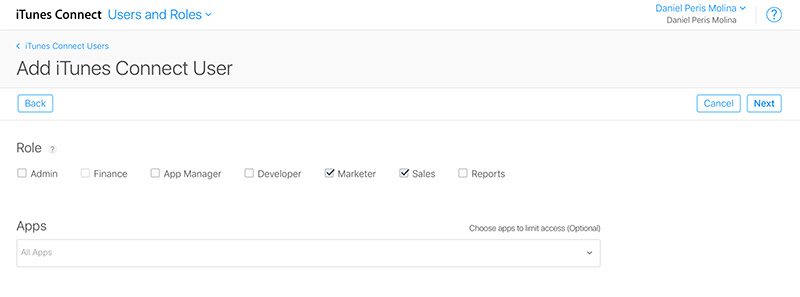
Step 1
Login to your iTunes Connect account and create a new account with “Marketer” and “Sales” roles. This new account will have a new Apple ID (don’t worry, it’s FREE):
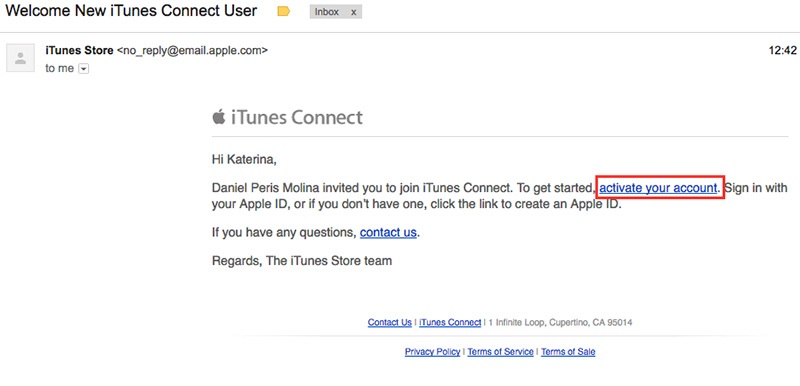
Step 2
This new user will receive an email to activate account. Activate it and go to next step.
Step 3
Go to Integrations section in TheTool and add a new iTunes Connect integration. Add email and password of the new user you have just created, click on “integrate” button and you’re ready to go:
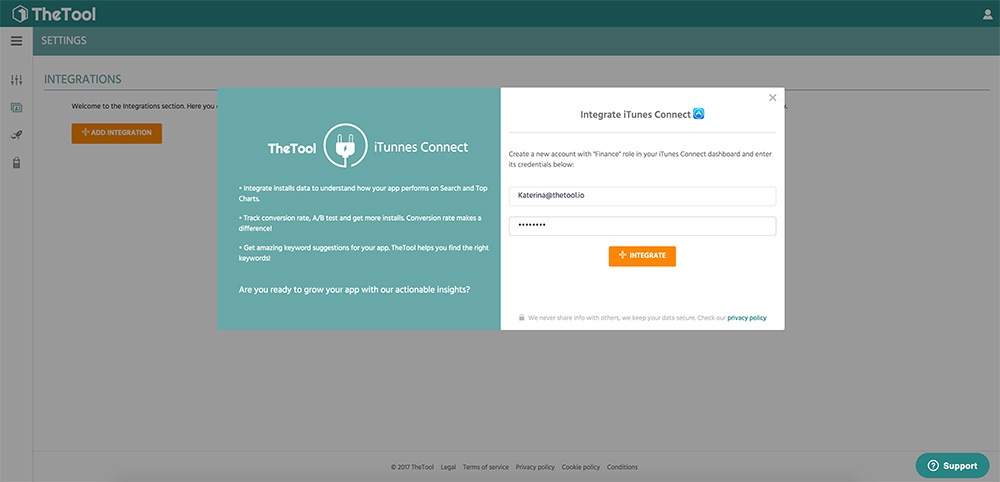
TheTool will verify the integration within the next 24 hours. So, in 24 hours you will start viewing iTunes Connect data in your TheTool dashboard. Yeah!
Google Play Console integration
Google Play Console integration is also very easy… Let’s go for it!
Step 1
Go to your Google Play Console and login with your credentials.
Step 2
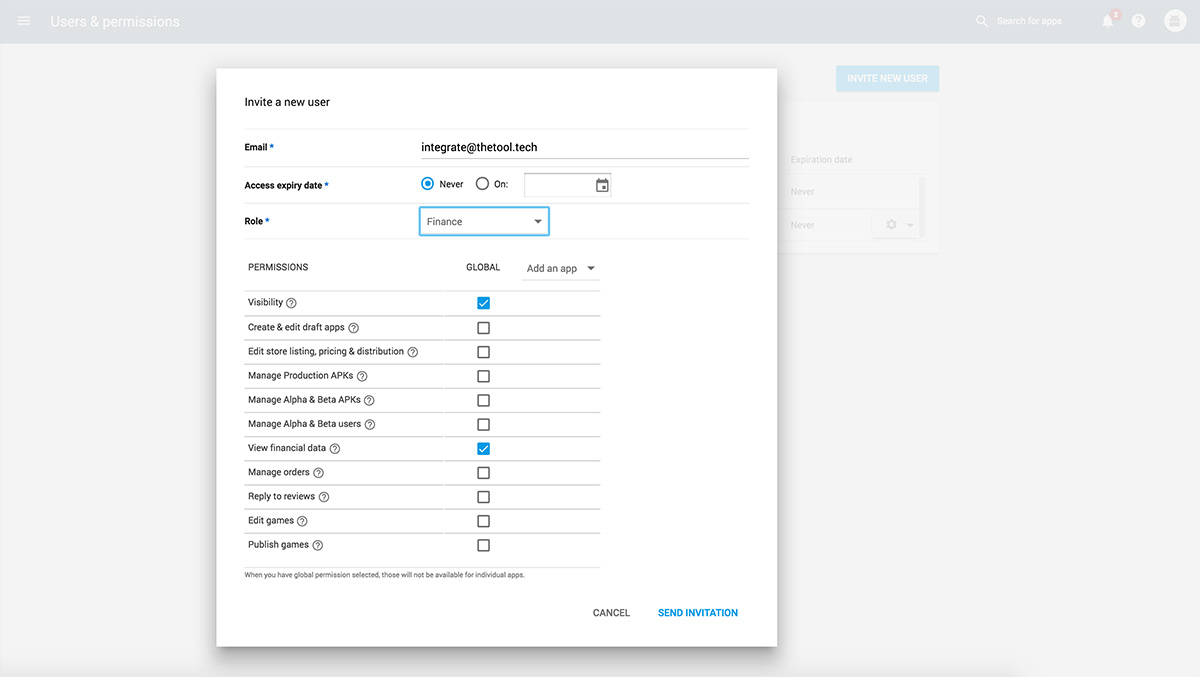
Go to Settings > Users & Permissions and invite a New User “[email protected]”, assign the Role “Finance” to this user and click “Send Invitation“:
Step 3
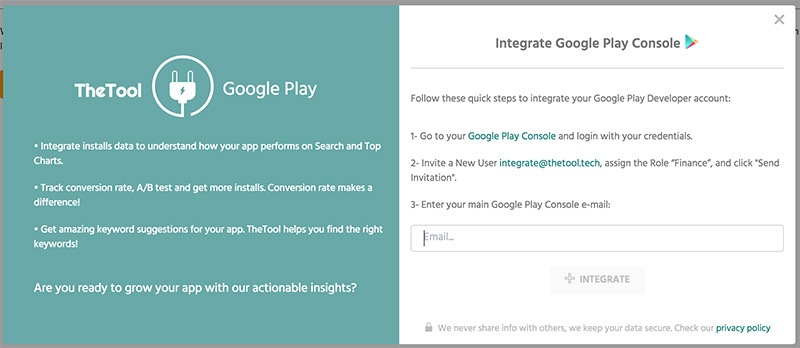
Go to Integrations section in TheTool and add a new Google Play Console integration. Enter the main (admin) email of your Google Play Console account and click “integrate” button:
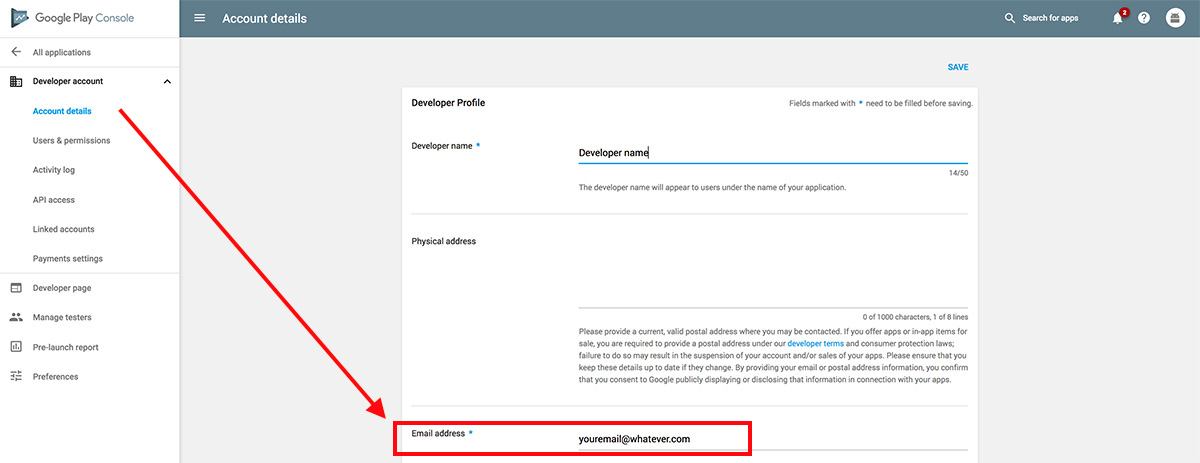
Important: you can find the main (admin) email of your Google Play Console account in Settings > Account details > Email address:
After completing the 3 previous steps, the admin of the Google Play Console account will receive an email with a link to click in order to verify integration. TheTool will approve the integration within the next 24 hours. So, you will start viewing Google Play Console data in your TheTool dashboard in a maximum of 24 hours. Amazing!
It’s very important that you check your email inbox and verify integration. Check “spam” folder if you haven’t received it.
Done – your app will soon be ASO-ready!
As soon as you have integrated a developer console, you will start seeing in your TheTool dashboard the data about installs per day and per country, and the conversion rate to installs per day and per country. You can track this information daily and make annotations in TheTool to mark updates, app store listing changes, or user acquisition campaigns, and see how they impact your conversion rate and installs. Way better now, right? 🙂
Keywords and conversion rate optimization are the first and the most important step of any ASO strategy. Try to choose your app or game keywords in the way that your app ranks at least in Top 5 for these keywords. Instead of focusing on high-competitive keywords, go for long-tail ones to achieve maximum visibility in the search results.
Repeat this analysis for different countries and start monitoring the installs of your app worldwide!
If you have any questions, tell us in the comments!
Share this post about first steps with TheTool with your friends or colleagues. Thanks in advance!